-
FastAPI(Python)과 Svelte로 무작정 웹 개발하기(기초) - 3Web 2021. 8. 20. 22:29
FastAPI(Python)과 Svelte로 무작정 웹 개발하기(기초) - 2
FastAPI(Python)과 Svelte로 무작정 웹 개발하기(기초) - 1 여러분이 아는 서비스 중 파이썬으로 개발된 서비스가 얼마나 될까요? 대표적으로 Instagram이 Django로 개발됐다고 알려졌죠. 그 외에 Reddit, Spotif
mattpy.tistory.com
지난 글에서 Svelte와 FastAPI를 조합하는 방법을 간단하게 알아봤습니다. 이번에는 rollup.config.js를 수정해서 좀 더 편한 개발환경을 만들고 백엔드(FastAPI)와 프론트엔드(Svelte) 작업을 통해 간단한 글쓰기 기능을 하나 만들어 보겠습니다.
핫 리로딩(Hot Reloading) 사용하기
프론트엔드를 개발하게 되면 내가 수정한 코드가 실제 화면에 어떻게 반영되는지 바로바로 확인이 필요합니다. 코드를 수정하고 브라우저로 돌아가서 새로고침(F5)을 누르고 수정하고 새로고침 하고... 너무 귀찮고 매번 페이지를 처음부터 불러와야 하기 때문에 시간도 은근히 잡아먹고 비효율적입니다. 그래서 보통 프론트엔드 개발 시에는 프론트엔드 개발 서버를 따로 띄워 핫 리로드가 가능하게 합니다. 핫 리로드란 코드를 수정하면 브라우저가 새로고침 없이 수정된 코드가 자동으로 반영되는 것입니다. 전 글에서 npm run dev를 실행했을 때 실행되는 서버가 이를 가능하게 해 줍니다. 그럼 약간의 코드를 수정하고 테스트해봅시다.
우선 backend/templates/index.html 파일을 backend/static 으로 옮기도록 하겠습니다. 그리고 코드를 아래와 같이 고칩니다.
<!doctype html>
<html lang="ko">

<head>
  <meta charset="utf-8">
  <link rel="stylesheet" href="/public/bundle.css">
  <title>Fast Blog</title>
</head>

<style>
  h1 {
    color: brown;
  }
</style>

<body>
  <script src="/public/main.js"></script>
</body>

</html>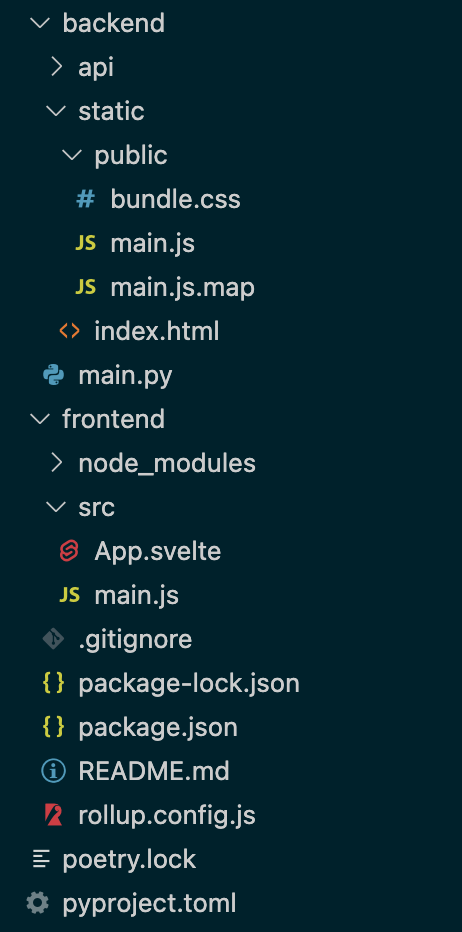
폴더 구조 그다음 프론트엔드 몇 가지 설정을 고쳐야 합니다. 우선 package.json부터 고쳐볼게요. scripts의 start 부분을 아래와 같이 고쳐야 합니다.
{
  "name": "svelte-app",
  "version": "1.0.0",
  "private": true,
  "scripts": {
    "build": "rollup -c",
    "dev": "rollup -c -w",
    "start": "sirv ../backend/static"
  },
  "devDependencies": {
    "@rollup/plugin-commonjs": "^17.0.0",
    "@rollup/plugin-node-resolve": "^11.0.0",
    "rollup": "^2.3.4",
    "rollup-plugin-css-only": "^3.1.0",
    "rollup-plugin-livereload": "^2.0.0",
    "rollup-plugin-svelte": "^7.0.0",
    "rollup-plugin-terser": "^7.0.0",
    "svelte": "^3.0.0"
  },
  "dependencies": {
    "sirv-cli": "^1.0.0"
  }
}
rollup.config.js도 수정하도록 합니다.
import svelte from 'rollup-plugin-svelte';
import commonjs from '@rollup/plugin-commonjs';
import resolve from '@rollup/plugin-node-resolve';
import livereload from 'rollup-plugin-livereload';
import {
  terser
} from 'rollup-plugin-terser';
import css from 'rollup-plugin-css-only';

const production = !process.env.ROLLUP_WATCH;

function serve() {
  let server;

  function toExit() {
    if (server) server.kill(0);
  }

  return {
    writeBundle() {
      if (server) return;
      server = require('child_process').spawn('npm', ['run', 'start', '--', '--dev'], {
        stdio: ['ignore', 'inherit', 'inherit'],
        shell: true
      });

      process.on('SIGTERM', toExit);
      process.on('exit', toExit);
    }
  };
}

export default {
  input: 'src/main.js',
  output: {
    sourcemap: true,
    format: 'iife',
    name: 'app',
    file: '../backend/static/public/main.js' // TODO: static에 index.html 올리고 sirv로 프론트엔드 개발환경 구성
  },
  plugins: [
    svelte({
      compilerOptions: {
        // enable run-time checks when not in production
        dev: !production
      }
    }),
    // we'll extract any component CSS out into
    // a separate file - better for performance
    css({
      output: 'bundle.css'
    }),

    // If you have external dependencies installed from
    // npm, you'll most likely need these plugins. In
    // some cases you'll need additional configuration -
    // consult the documentation for details:
    // https://github.com/rollup/plugins/tree/master/packages/commonjs
    resolve({
      browser: true,
      dedupe: ['svelte']
    }),
    commonjs(),

    // In dev mode, call `npm run start` once
    // the bundle has been generated
    !production && serve(),

    // Watch the `public` directory and refresh the
    // browser on changes when not in production
    !production && livereload('../backend/static/public'),

    // If we're building for production (npm run build
    // instead of npm run dev), minify
    production && terser()
  ],
  watch: {
    clearScreen: false
  }
};
아래 livereload 부분을 고친 거랍니다. 해당 폴더의 파일이 수정되면 reload 됩니다. 설정은 다 끝난 거 같네요. 그렇다면 frontend 폴더로 가셔서 npm run dev를 실행시키면 http://localhost:5000으로 서버가 구동될 것입니다. 거기에 접속하면 이전에 만들었던 화면이 보일 것입니다. frontend/src/App.svelte 파일을 수정해보시고 화면이 바로 바뀌는지 확인해보시길 바랍니다.
프론트엔드에서 백엔드로 요청
개발환경에서 핫 리로딩 사용을 위해 프론트엔드 서버를 따로 실행했습니다. 그렇기 때문에 백엔드 서버와 프론트엔드 서버를 각각 동작시켜야 합니다. 터미널을 하나 더 열고 백엔드 서버도 실행하도록 합니다. poetry run uvicorn backend.main:app --reload
백엔드는 http://localhost:8000위에서 실행할 것입니다. 간단한 API 함수 하나 만들어 볼게요. main.py를 아래와 같이 수정해봅니다.
import os

from fastapi import FastAPI, APIRouter
from fastapi.staticfiles import StaticFiles

BASE_DIR = os.path.dirname(os.path.realpath(__file__))

app = FastAPI()

app.mount("/public", StaticFiles(directory=os.path.join(BASE_DIR, "static/public")), name="static")

api_router = APIRouter()


@api_router.get("/post/{pk}")
def index(pk: int):
    return {"data": pk}


app.include_router(api_router, prefix="/api")
그리고 http://localhost:8000/api/post/1에 접속해보세요. 아래와 같은 화면을 볼 수 있을 겁니다.
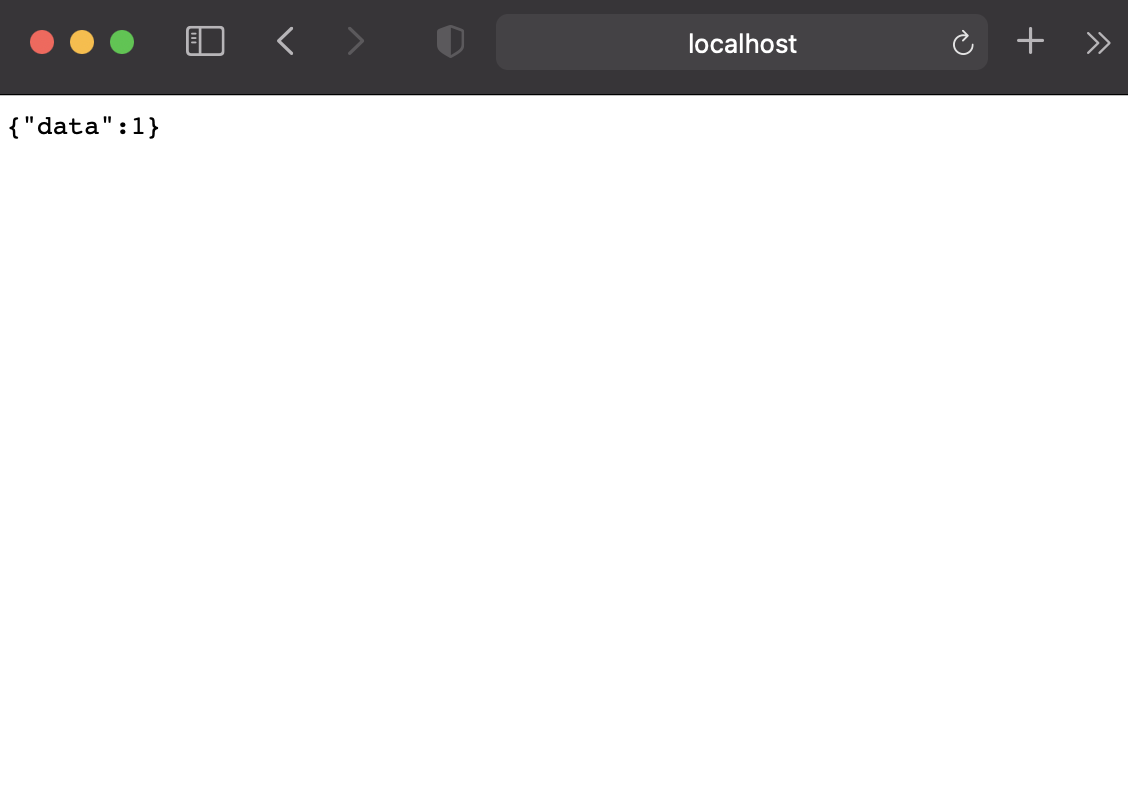
뒤에 숫자 1을 변경해보세요. 입력 숫자에 따라 응답이 달라지는 게 보이실 겁니다. 이제 저 데이터를 프론트엔드에서 호출해보도록 하겠습니다.
우선 프론트엔드에서 백엔드를 호출하려면 CORS를 허용해야 합니다. CORS에 관한 자세한 설명을 여기를 참고하세요. FastAPI 공식 문서에도 설명이 나와 있으니 참고 바랍니다. main.py를 수정합니다.
import os

from fastapi import FastAPI, APIRouter
from fastapi.middleware.cors import CORSMiddleware
from fastapi.staticfiles import StaticFiles

BASE_DIR = os.path.dirname(os.path.realpath(__file__))

app = FastAPI()

app.mount("/public", StaticFiles(directory=os.path.join(BASE_DIR, "static/public")), name="static")

origins = ["http://localhost:5000",]

app.add_middleware(
    CORSMiddleware,
    allow_origins=origins,
    allow_credentials=True,
    allow_methods=["*"],
    allow_headers=["*"],
)

api_router = APIRouter()


@api_router.get("/post/{pk}")
def index(pk: int):
    return {"data": pk}


app.include_router(api_router, prefix="/api")
이제 프론트엔드 코드를 수정하겠습니다. App.svelte를 수정하면 됩니다.
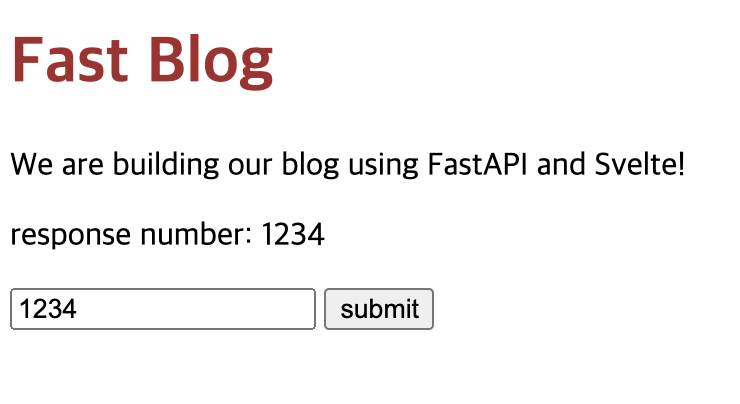
<script>
  let number;
  let inputNumber;

  const request = async (endpoint) => {
    const resp = await fetch(`http://localhost:8000/api${endpoint}`);
    const result = await resp.json();
    return result;
  };

  const getNumberFromBackend = async (no) => {
    const result = await request(`/post/${no}`);
    number = result.data;
  };
</script>

<main>
  <h1>Fast Blog</h1>
  <p>We are building our blog using FastAPI and Svelte!</p>
  <p>response number: {number || ''}</p>
  <input bind:value={inputNumber}>
  <button type="button" on:click={() => getNumberFromBackend(inputNumber)}>submit</button>
</main>

<style>
  h1 {color: brown;}
</style>
위와 같이 수정하시면 인풋 폼과 제출(submit) 버튼이 생깁니다. 숫자를 입력하고 버튼을 누르면 response number 옆에 입력한 숫자가 그대로 출력되는 것을 보실 수 있습니다. 해당 숫자는 입력한 숫자를 백엔드에 보내고 백엔드는 그 숫자를 그대로 응답해줍니다. 응답을 받은 프론트엔드는 해당 데이터를 number라는 변수에 할당해주고 화면에 출력합니다.
다음에는 DB를 이용해 글을 포스팅하고 작성한 글을 읽는 기능을 만들어 보도록 하겠습니다. 감사합니다.
반응형'Web' 카테고리의 다른 글
FastAPI(Python)과 Svelte로 무작정 웹 개발하기(기초) - 2 (2) 2021.07.28 FastAPI(Python)과 Svelte로 무작정 웹 개발하기(기초) - 1 (2) 2021.07.26